Last Updated: May 2023
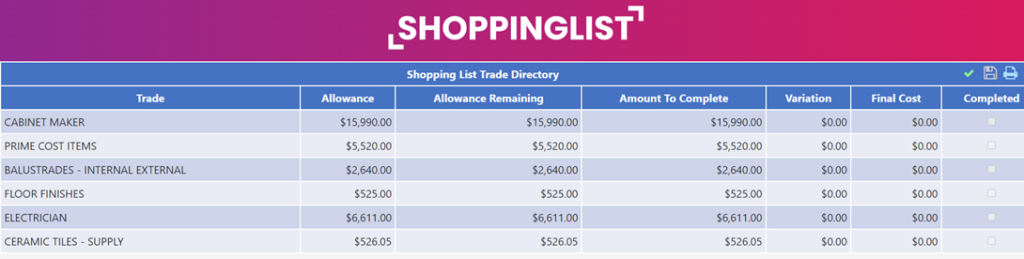
The Shopping List can be accessed by the Project Owner that they can use on their tablets, phones or pc’s. It outlines the Prime Cost Items specific to their project, showing the cost allowances so that they can make their selections confidently without fear they will go over budget.
Project Owners can add in details of each selection, add weblinks where they found them online and even take photos of the items and upload to their wish list. Once they have chosen their favourite, they tick the selection button and it is added to their Picklist. This Picklist becomes the selections list for you so you are aware of their selections.
In instances where a Project Owner may choose a concealed cistern toilet, this is important for you to make the plumber aware of the type of installation required. It also encourages the Project Owner to make the designer/architect aware of their selections in case the design needs to be adjusted to suit.
Show them how it works, how they are shown their allowances for their PC items, and how many taps and basins are allowed for (for those double basin vanity lovers). Explain that if they find a 1000mm wide fridge of their dreams that meets the allocated allowance, add it to the wish list, but make sure the designer has allowed for a space large enough to fit it – if not, they can work with the designer on it. Explain that if they find bathroom wall tiles on sale and make savings, they can either keep the savings, or better yet, get that freestanding bath that was just out of the budget allowance. Before you finalise the Final Contract Price, the Project Owner really should have all of their selections made so that you can transfer the details to the Master Cost Assembly. If they haven’t made all of their selections, you need to ensure they are aware of the allowances in the Final Contract Price so that they don’t go over budget during construction.
To give the Project Owner access to the Shopping List you can do it by creating a User profile for the Project Owner (see Users) or by simply copying the URL when you select the Shopping List and emailing it to the Project Owner.

Step 1 Starting at the Trade Directory, you will see a list of items from the Master Cost Assembly that have been populated. Note the columns that show the allowances for the areas.

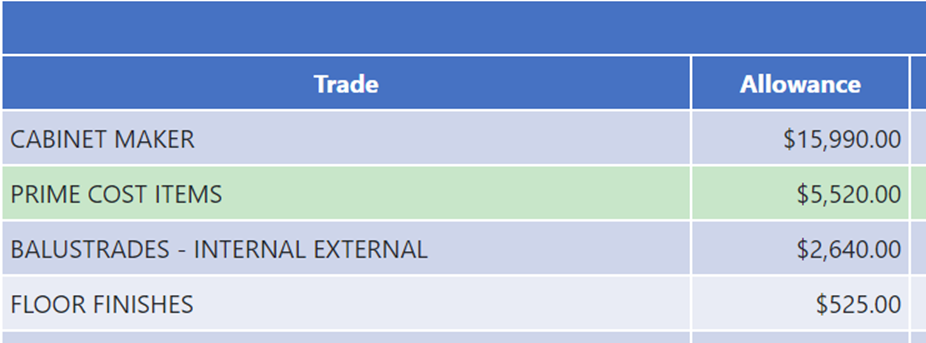
Step 2 Using Prime Cost Items as the Example, select this Trade.
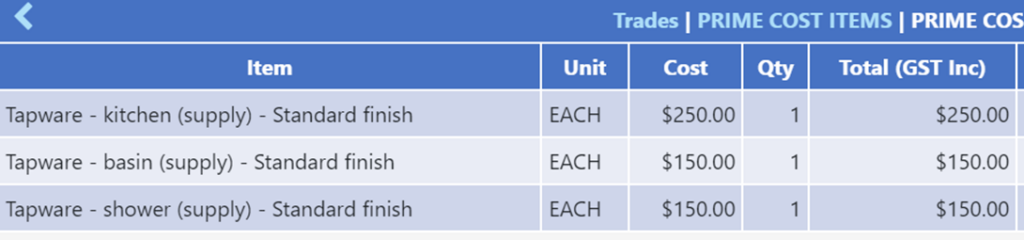
Step 3 A list of items are shown for this category, once again indicating the allowances.

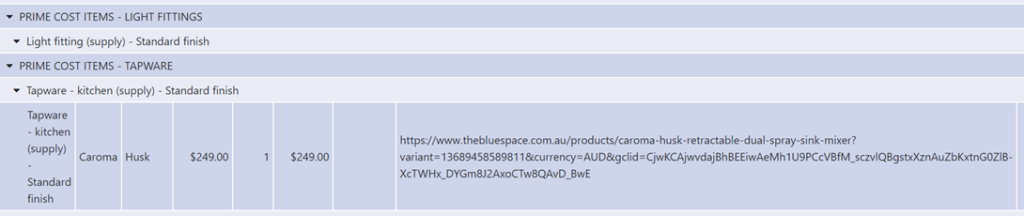
Step 4 Selecting Tapware, lets see the items and their allowances.

Step 5 You see there are three tapware items required for the project, each for different wet area rooms, and each with its own allowance.
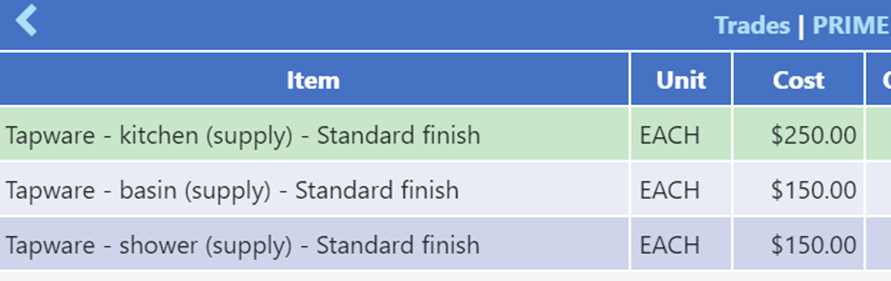
Step 6 Selecting Kitchen, lets see how to add details.
Step 7 You can add the details of an item you are interested in.

Step 8 When the Final checkbox is ticked, you will not the summary at the bottom of the page will show the allowance and if any savings or over spending has been made.

Step 9 Back at Tapware Allowances check the Completed checkbox.

Step 10 At the bottom menu, select Final Selection.

Step 11 This is a list that can be downloaded and used as the specifications as it provides all the details of the final selections made.
Still Need Help? Please contact the team at C2CPRO via email at admin@c2cpro.com.au or book a call to schedule a dedicated time with one of the team.