Last Updated: June 2023
One of the supporting documents to accompany the Contract is the Cashflow Schedule. This highlights the transparency of the contract and outlines the number of Claims that will be mirrored in the contract payment schedule when preparing your contract.
Each claim is made up of expected payments for each trade and supplier at the progressing stage of the project. Allocating the expected payments is important as this is when the funds will be drawn down into the joint security account, so it’s important to allow for any ordering of items, eg, windows, at an earlier stage than when the windows will actually be delivered.
When the final contract price has been decided on and the contract is being prepared, the Cashflow Schedule is created based on the final contract price.
Step 1 Select the Job, select Estimates and select the estimate you are working on (ie. Primary Estimate).
Step 2 Select Cashflow Schedule.

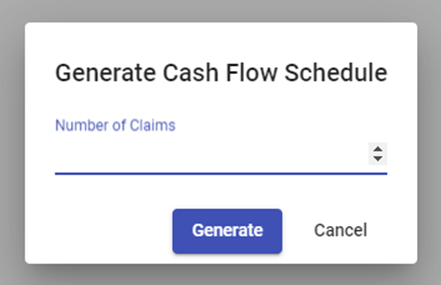
Step 3 A pop up will appear where you enter the expected number of Claims for the project. This is dependant on the expected timeline and size of the project. Enter the number (this includes the Deposit claim) and click Generate.
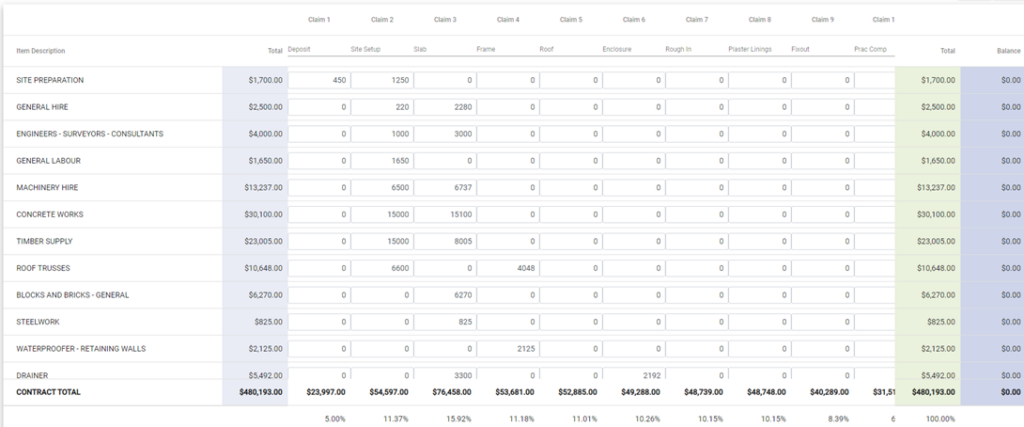
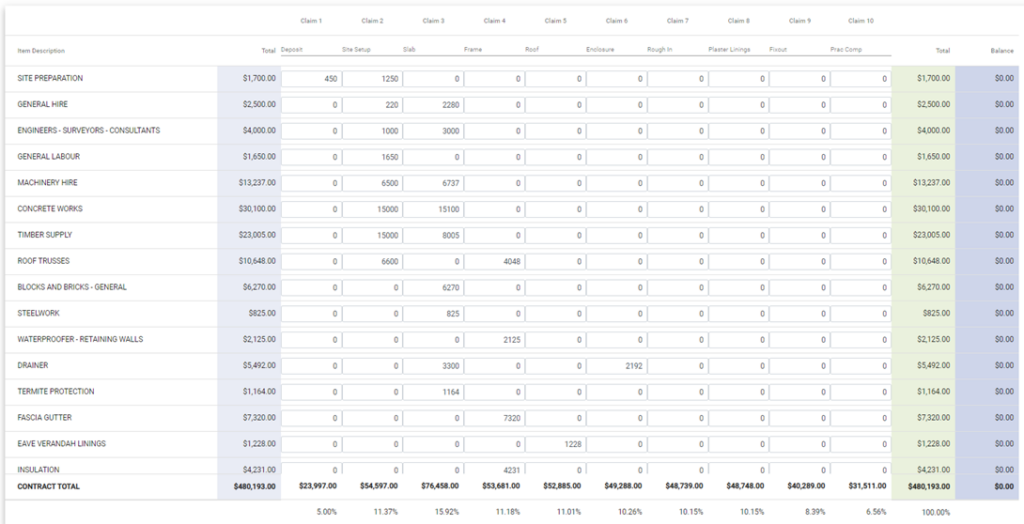
Step 3 The schedule will appear.
The Claim names are at the top of the columns.
To the left is the list of Trade Areas as per the Master Cost Assembly, along with the allowances.
The cells in the schedule are where you allocate the allowances of Trade Areas in each of the stage Claims.
The right hand columns show the balance as you build up the schedule.
The row at the bottom highlights the claim total, along with a % that will assist when completing the contract and ensuring the claims are at an appropriate amount.
Step 4 At the top of the Schedule name each Claim, eg. Claim 1 Deposit, Claim 2 Site Setup, etc. until all Claims are named, with the final one being Practical Completion.

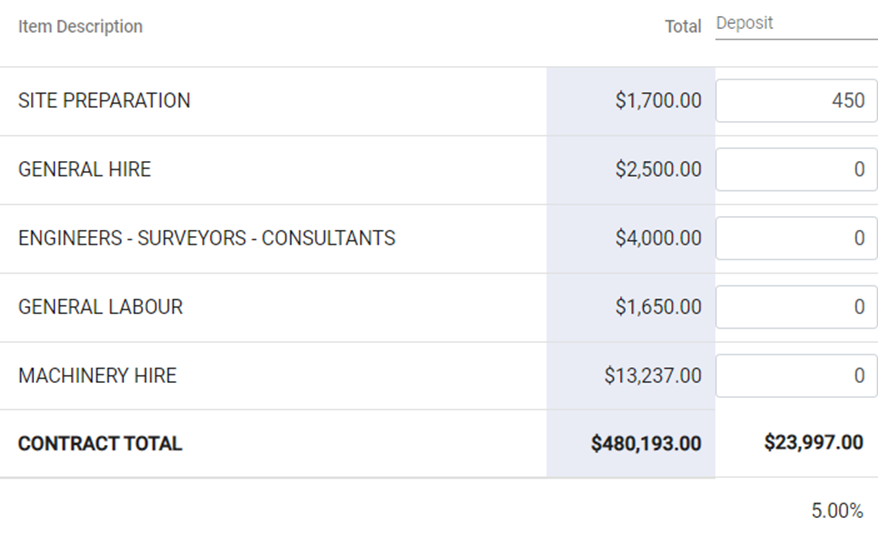
Step 5 Deposit column is the first column to work on and the sum must calculate to 5% of the contract price. Firstly, you will note that the trade area Contract Administration will be automatically applied to the schedule. These are the C2CPRO fees for the use of the Construction Management Contract and the Joint Security Account and are to be paid from the Joint Security Account.

Step 6 The next trade area to complete should be the Construction Manager – Project Costs.
The amount to be calculated will be 5% of the Management Fees, plus the sum of the insurances, like Home Warranty Insurance and QLeave that are required to start the project.
Using below as an example, the Management fee is $69,889, so 5% is $3,494.

The sum of the insurances are $12,986.
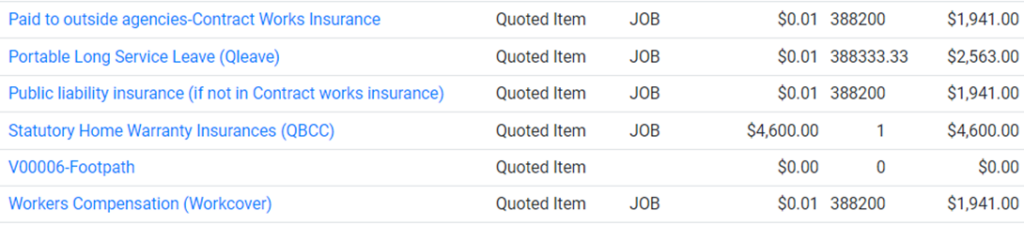
The amount to be placed at Claim 1 Deposit is the sum of $3,494 and $12,986 is $16,480.
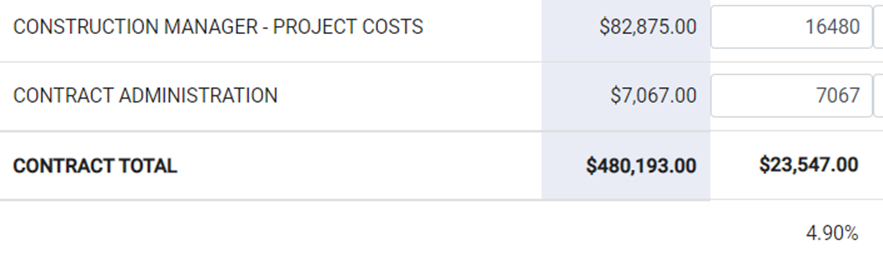
Step 7 Note the sum of the Contract Administration and the Construction Manager – Project Costs don’t quite make up 5%, so add any other items from the trade areas to make up the 5%. In this example, the allowances for Site Preparation and for General Hire have been added to make up the 5%.
Step 8 Take the balance of the Construction Manager costs and divide by the remaining number of claims, in this instance, after the Deposit Claim, there are 9 more claims, so divide by 9. Once entered, note the balance (blue column) is at $0.

Step 9 Claim 2 Site Setup: As a guide, add this stage to your claims as it is a stage that doesn’t require a lot of funds to complete (ie. Site fence, site toilet, entry gravel pad), but once complete, you can make a drawdown request for the funds to be deposited into the joint security account.
The allocated funds at Site Setup are in preparation for ordering of materials and supply items and gives cashflow to the project.
In the sample below, you can see funds allocated, and at the bottom of the column you can see the total claim amount, and the percentage of the claim vs contract total and to the right in the blue column, you can see the balance of the trade area.
Step 10 Complete the Schedule by entering the Trades and Suppliers costs, based on the expected timeline of events.
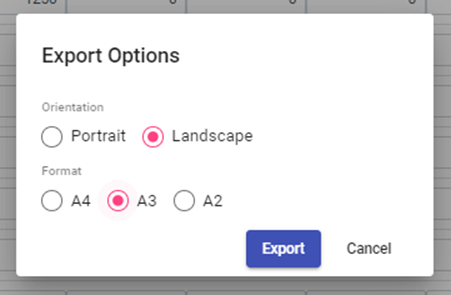
Step 11 Once complete, click Download Report.

Step 12 You will be prompted with some export options (landscape is the best) and a PDF report will download.
Still Need Help? Please contact the team at C2CPRO via email at admin@c2cpro.com.au or book a call to schedule a dedicated time with one of the team.