Last Updated: July 2023
Variations are an important aspect of the building process and is often not tracked properly throughout the project. The Cost Summary has a column dedicated to Variations which shows the Variation to the Trade Area and to the overall contract price. This ensures all parties are aware of all variations throughout the project..
Create a Variation
To create a Variation, you go to Variations, fill in the details and set the status to Pending, and present to the client in the required timeframe for their signed approval. Once approved, set the status to Approved, and then the Variation cost details will be shown in the Cost Summary, ready to have Bills claimed against it.
Step 1 Select the Job and select Variations from the ribbon at the top.

Step 2 Select Create.

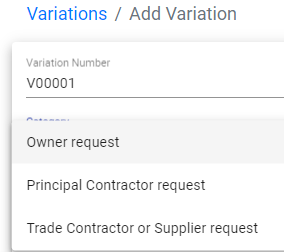
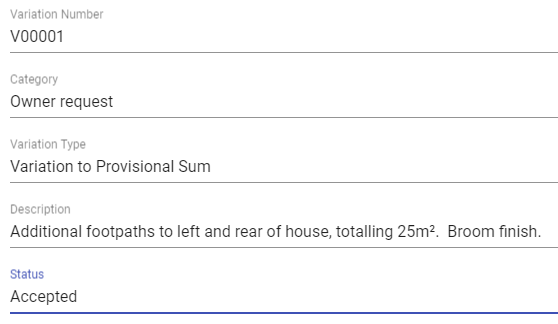
Step 3 Select the Category.
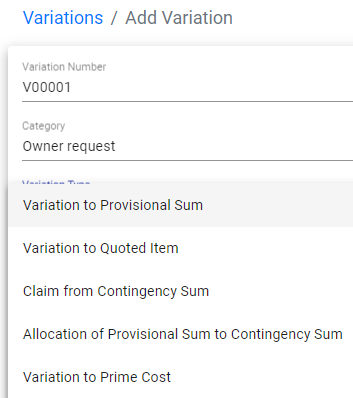
Step 4 Select the Variation Type.
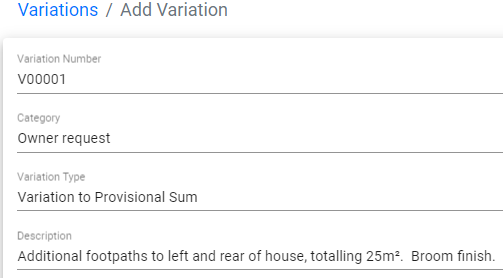
Step 5 Add a Description. In this example, the project owner has requested extra concrete footpaths surrounding the house, so you would write, ‘Additional footpaths to left and rear of house, totalling 25m². Broom finish.’
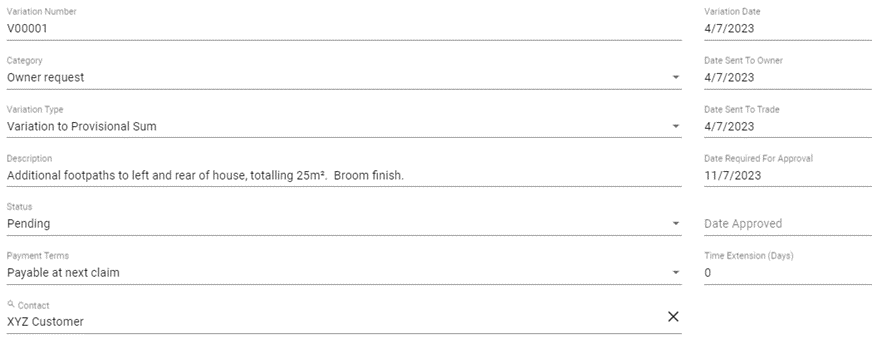
Step 6 Set the Status to Pending, and nominate the payment terms. The Contact is the client. Apply the relevant dates, and if you wish, drag and drop or attach any documents that are relevant. Save.
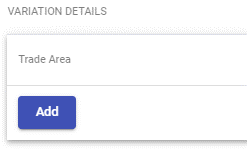
Step 7 To add the Variation items select Add.
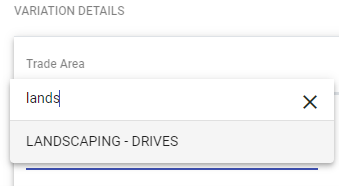
Step 8 This example is for an additional footpath, which is found under Trade Area Landscaping-Drives (or could be added to Concrete Works).
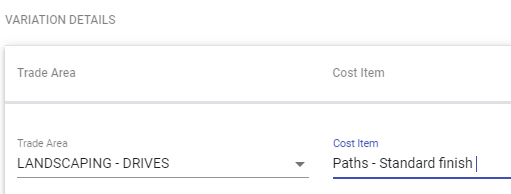
Step 9 The Cost Item is the descriptor, so we have chosen Paths -Standard Finish from the preloaded items that come from the items in the Master Cost Assembly. You could manually type your own descriptor – adding the Variation Number to the descriptor helps when completing the Claims as it is clear to both you and the client what the Claim is for.
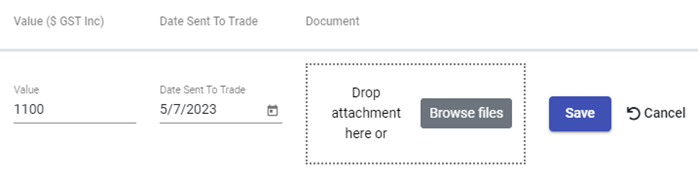
Step 10 Add the Value, and the date sent to any relevant contractors for a quote and add any attachments. Save.
Step 11 You can add multiple lines, and in this example, add a Construction Management margin to the variation. Save.

Step 12 Select Download Variation Report and a PDF will be saved to the Downloads folder on your computer.

Step 13 The report will outline the details of the Variation along with the Variation to the total contract price. Email to the project owner for approval.
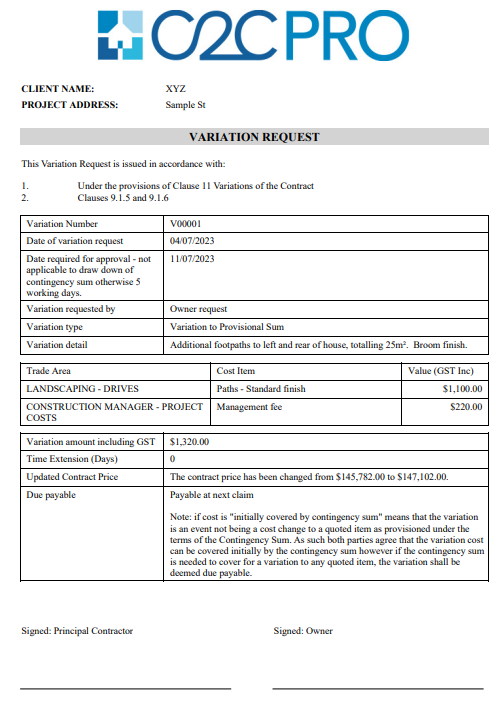
Step 14 When the Variation has been approved and signed, mark the Variation as Approved by selecting the Variation, select Edit, and change the Status to Approved.
Step 15 Go to Cost Summary and to where the Variation has been applied, and you will note the Variation is shown in the Variation column.

Also note the change to the overall contract price.

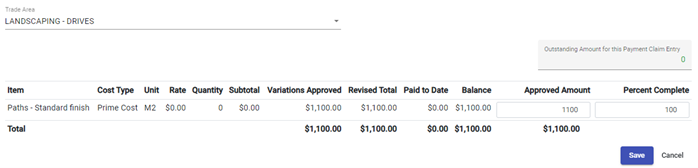
Claim a Variation
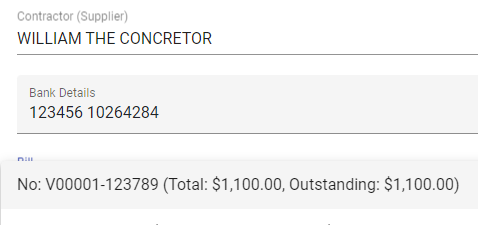
As like any original item from the Cost Summary, the Variation will be claimed from a contractor’s invoice/bill. In this example we have used, there will be two Bills, one from the Concreter for the works and one from the Construction Manager for managing the works.
Step 1 Add the Bills (refer Bills). Note the use of the variation number for reference.

Step 2 Select Payment Claims and select the most recent Claim. Add Entry, select the Contractor and then the Bill for the Variation.
Step 3 At Comments, refer to Variation number for easy reference.
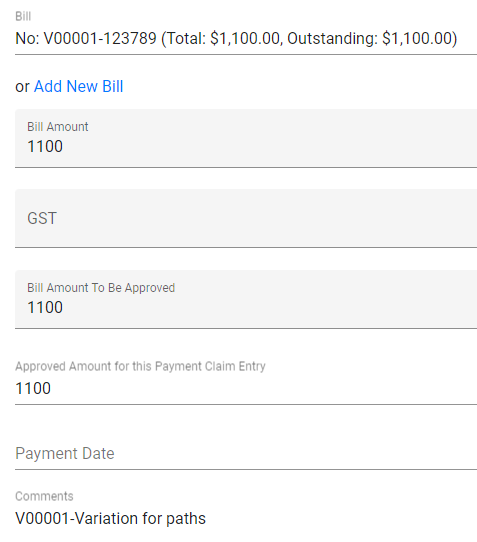
Step 4 Select the Trade Area where the Variation was applied and apply the amount to be claimed. Save. Continue adding the Bills to the Claim that relate to the Variation.
Still Need Help? Please contact the team at C2CPRO via email at admin@c2cpro.com.au or book a call to schedule a dedicated time with one of the team.