Last Updated: May 2023
A Job is where all the relevant data is found for the project. A Job is where you will start once you have added the Client Account and Contact Details.
Step 1 At the Home Page, select Create.

Step 2 Add the relevant details of the project, starting with Name. This is the Name of the Project and your reference. You will also note a Job Number will be automatically applied.
Step 3 At Client Account, select the client account that has been made previously. If you haven’t yet made a client account, you can make one by selecting ‘Click here to create one now’.

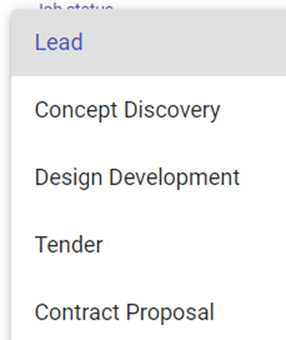
Step 4 You will note the Job Status will be set to Lead. If you are going to create a Discovery at this time, click on the drop down and update the Job Status to Discovery. Updating the Job Status is important as you move through the project as it releases relevant features in the program that you will require at each stage.
Step 5 Add a description of the Next Step (not required), and the date you assume the next date will be done by.
Step 6 Select the contract type you intend to use. This is important as when you are at construction stage, items like Drawdown Request and Variations will reference clauses from the contract chosen.
Step 7 Enter the Budget, if known. This is for information purposes only.
Step 8 Enter the Funding Status, if known. This is for information purposes only.
Step 9 The remaining items at the bottom of the Job Overview can remain untouched for the moment. These items are to be added at Contract Won job Status.
Step 10 Save.
Now at the Home Page you will see the list of Jobs. You can access the Job by clicking on the Job Number.
Still Need Help? Please contact the team at C2CPRO via email at admin@c2cpro.com.au or book a call to schedule a dedicated time with one of the team.