Last Updated: July 2023
The Project Management Schedule is a form of Gantt chart that shows dependency relationships between activities during a process.
C2CPRO has provided templates for typical projects, and there is also a template that involves the preliminary design stages too.
To create a PM Schedule follow these steps:
Step 1 Select the Job, and select Project Management Schedule at the top ribbon.

Step 2 A pop up will be shown where you get the option to Create a Blank Schedule or Choose Template. At Choose Template, click on the dropdown and select the relevant template and then click Create.

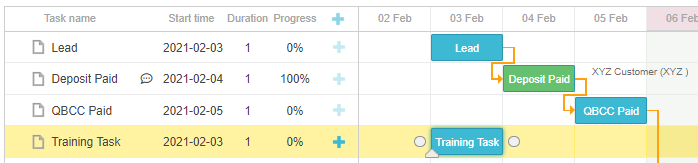
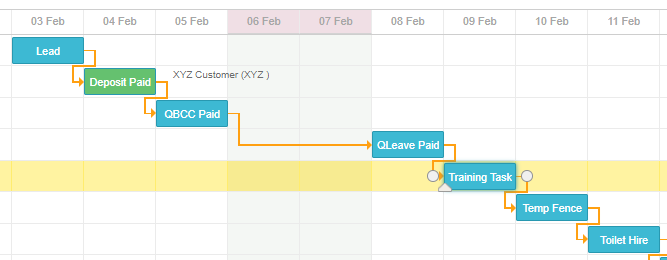
Using the Single Storey House template as the example, you see a prepopulated set of items in the list to the left, and at the schedule you can see the items set over a timeline.
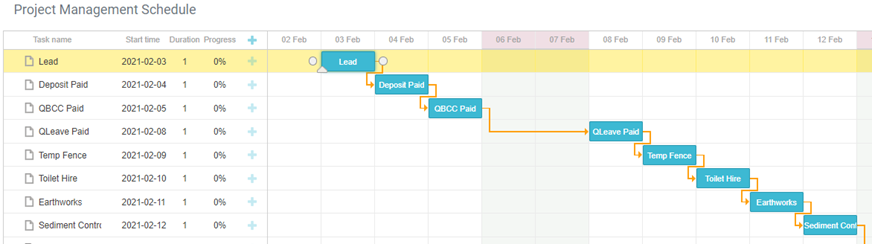
The template is set with dependencies (orange arrow), so that when times are pushed out, the other items will also be reflected.
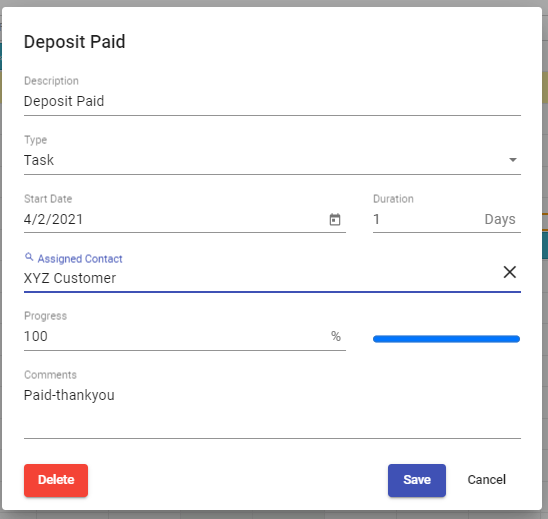
At each item, you can edit and add details. By either double clicking on the item in the schedule, or on the item in the list, a pop up will appear where you can add the details.

Step 3 Edit the details as required, like the start date, the duration, and then the assigned Contact. A Contact is nominated for communication via email from the PM Schedule when any changes are made.
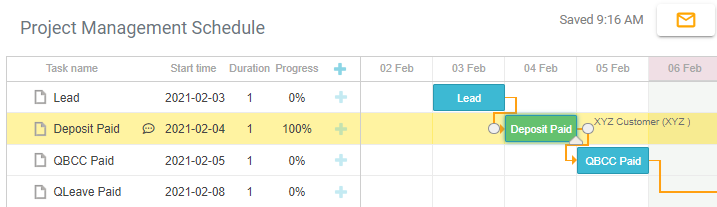
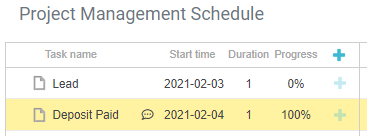
You will note that each time a Contact is added to the task in the schedule, a notification symbol (yellow envelope) is shown at the top right, shaking. This is indicating that notifications are ready to be sent out to the Contacts. This provides the details set out when you added them to the task.
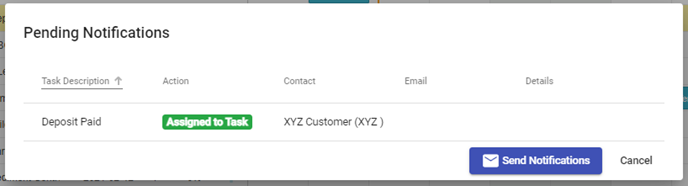
Step 4 Select the notification symbol to show a list of the Tasks and the Contacts and then select Send Notifications.
Step 5 The Contact will receive an email like this:
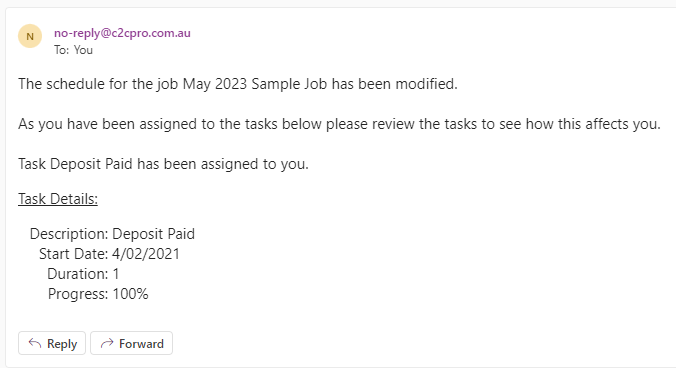
When a task is edited by Duration, all affected Contacts will be notified.
Note: Let all Contacts now that they will be receiving communication from a noreply@c2cpro.com.au email address, and to always check their junk mail in case it is redirected.
Step 6 To add a new task, select the plus symbol.
Step 7 A New Task will pop up, enter the Description and details as required, Save.

Step 8 Scroll to the bottom of the list, find the task and click and hold down, and move up the list to where it is required.
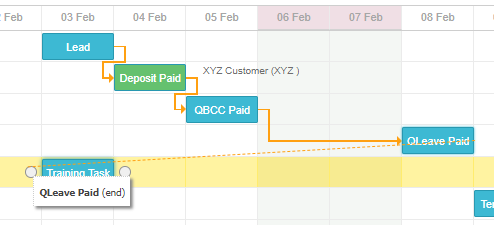
Step 9 To include the new task with the dependencies, you will have to remove the dependencies between others, so, to delete the dependency between QLeave Paid and Temp Fence, double click on the orange arrow and a pop up will show, confirming removing the link. Click OK

Step 10 Now hover over QLeave Paid and find the small white dot. Click and drag to the left side of the new task. A new orange arrow will appear and the new task has moved to suit the timeline. Now you need to make the new task dependent on Temp Fence. Follow the same steps to add the orange arrow.
Step 11 You can also delete a task by right clicking on the task in the list:
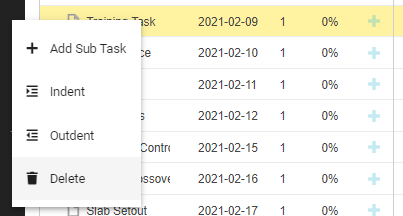
Step 12 You can also Indent the task so it becomes a Sub Task, or Outdent to be a Main Task.
As the project progresses through construction, you can amend and update the PM Schedule to suit.
Still Need Help? Please contact the team at C2CPRO via email at admin@c2cpro.com.au or book a call to schedule a dedicated time with one of the team.